Showing posts with label Creating a Beautiful Landscape. Show all posts

Thursday, March 1, 2012

Building Our Waterfall Part One: Preparing the Foundation


 Anything I can dream... my Honeyman can build.
 
And this is what he built for me... (and he let me help.)


We have a beautiful Patio (read our story here) built in 2009,
that we especially enjoy on warm Summer nights.


  The adjacent landscape is striking...
 but something was missing.


 My heart yearned to hear the refreshing sound of water splashing
in my gardens 
at the end of a Summer's day.
(Anything I can dream?)

And so we began... 


It was April of 2011 
and our sleepy gardens were just beginning to awake.


Remember this is Utah 
where all but the bones of the gardens 
die back and all but disappear from the cold Winter months. 
 (One of the reasons I love the month of April ... watching as the barren landscape SPRINGS to life.)

We had dug out the bushes from the existing landscape in the Fall, 
so we began by transplanting the emerging plants, 
rerouting the sprinkler pipes 
and scraping the garden soil down to the clay base...
but only where the waterfall and stream would be.
After all... this was my perennial garden and I didn't
want to disturb the emerging plants and slumbering seeds.


 We stock-piled the scraped off garden soil 
to later place around the waterfall and stream at project's end.


The head of the waterfall would be up near the house, 
so we prepared a gentle slope down to the rocks already in place 
that lined the perennial bed. 

These were the river rocks that were gathered from our soil 
when we first landscaped our property,
and we planned to incorporate them into the design of our stream.

The foundation of the waterfall head 
was laid in place with cinder blocks.


We packed our clay soil firmly in and around the blocks 
to provide a solid base for the waterfall.


We'll further build this up with large river rock... 
but wait, I'm getting ahead of myself, 
that will be another day's post.


Surely growing weary of hearing my repeated cautions  
to not step on my precious emerging peonies, 


my Honeyman covered several of them with pots 
to assure their safety in the construction zone. 


What a guy. 
Would contractors ever step so lightly?
♦  ♦  ♦ 

Our next post will include the engineering side of our project.

Did you know that the height of the waterfall
and the length and width of the stream are all determining factors 
of how large the holding basin must be at the base of the stream?
Then there is the issue of the pump...
what size is right for your project?

The answers to these questions will be discussed in our next post.

Stay tuned!


Tuesday, November 15, 2011

Daily Blessings... November 15th

Today I give thanks for 
This Grandmother's Garden


 Eight years ago this ground was covered 
in stones 
and bindweed 
and a single wild sunflower.

What a difference vision 
and a lot of hard work can make!


Today it is a sanctuary for
birds 
and bees
and butterflies
and all of God's creations who grace these gardens.

It is the window to my world.


Monday, May 9, 2011

A Surprise Finish! Part Four of our DIY Flagstone Patio

This is the last post in our series of how we built our Flagstone Patio.

With the sand in place between the stones, our patio was looking beautiful.  However, we wanted to keep the sand in the gaps and not have to worry about sand on top of the stones. We also wanted to insure our hard work would last through the extremes of  heat and below freezing temps as well as wind and rain and snow. 

The seller of our flagstone introduced us to a secret ingredient...


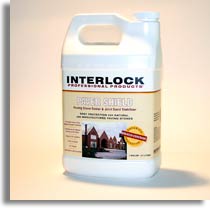
This sealant is a thermoplastic, all acrylic polymer which seals the stone, penetrates the jointing sand and binds the sand to the sides of the natural stone creating a stabilized surface.  It is designed to be sprayed on to the sand in the joints between the stones, holding or locking the sand in place.

The five-gallon container of Stone Lock we purchased was quite pricey, but worth the cost and effort to apply. Here's what we did:
  • We waited several days for the heat of the sun to completely dry the sand between stones.
  • Not wanting to 'glue' any sand to the surface of the flagstones, we carefully swept any remaining sand from the face of EACH stone, back into the cracks. Then we used a shop vac to vacuum any remaining grains of sand from off the flagstone. This was a bit tedious, but not difficult.
  • Next, using a pump sprayer, we sprayed the Stone Lock liberally to the sand in the cracks as well as on each stone. Initially the liquid looked like bluish milk, but dried clear. (I freaked out when I saw the blue, but my Honeyman assured me all would be well... and it was.) The patio was dry after 3 hours.
  • Noticing that some of the joints were not quite hard, we applied a second coat to all joints.
  • After waiting again for the Stone Lock to dry, our flagstone patio was finally complete.
Next month will be the third anniversary of our patio. It has fulfilled all our expectations. We love the beauty it brings to our landscape. We haven't been disappointed in its performance at providing a beautiful, easy to maintain, walkable surface where our family can enjoy the paradise we have created.  We worked together to create something beautiful, but more importantly, a choice opportunity to create family memories that bind our family together with love.  Or family motto has become: We Do Hard Things.

♦   ♦   ♦

A few additional notes: 
The Stone Lock was advertized to virtually eliminate weed and grass growth in the joints, which it did quite well during the first year. We now have a few weeds peaking out from the cracks but we have never re-applied the Stone Lock as was suggested.  Perhaps we will do that this year.

We have on occasion been asked why we didn't use mortar to fill the gaps.  The answer is quite simple. We don't like the looks of mortar. It tends to crack as the extreme temperature changes we experience here cause the stones to shift. Sand, even with the application of Stone Lock, is flexible enough to eliminate the unsightly cracks.

I would also like to note that my Honeyman is not a contractor or a builder, or anything of the sort. He is an engineer by trade and works at a computer. He has become, in the course of our almost 36 years together, The Builder of All My Dreams... if I can dream it, he figures out a way to build it.  Wait till you see what we're working on now!

To see the completed project visit: You've Got to Have a Dream

You may wish to also visit:  
Part One: Preparing the Foundation
Part Two: Laying the Stone
Part Three: Filling in the Gaps

Wednesday, May 4, 2011

Filling in the Gaps: Part 3 of our DIY Flagstone Patio

This is the third in a series of how our family built our beautiful Flagstone Patio.

You may view Part One and Part Two here:
Preparing the Foundation
Laying the Stone

Now that the stones are laid and level and the puzzle is complete, we're ready to fill in the gaps between the stones.  This step was actually a lot of fun.  Partly because the hard labor was behind us and the end was in sight but also because sweeping sand is just plain fun!

Genuine Happy Smile... Whistle While You Work


 Even the photographer wanted to give it a whirl.


Honeyman's job was to come to the rescue whenever there was a stone that was even the slightest bit "tippy". Gently moving it around at this point helped it to settle well. Remember, the leveling of the stones had already occurred in step two.


Sometimes we dumped a little too much sand in one spot. Our trusty snow shovel was the right tool to scoop up the extra.


Almost done.

With all the sand swept into the gaps, it's time to gently squirt the surface with water. We then let it dry for a day and added sand to any spots that needed to be topped off. Another sprinkling of water and we were ready to begin our final step in building our beautiful patio. 

Stay tuned for Part Four: A Surprise Finish!


Tuesday, April 26, 2011

A Giant Puzzle: Part Two of our DIY Flagstone Patio

This is the second in a series of how we (as in my Honeyman, a few of my kids and myself) built our beautiful Flagstone Patio.

I've always enjoyed the challenge of a good puzzle. This phase of our Flagstone Patio was the ultimate puzzle experience. With the foundation superbly in place, read about that experience here, and four tons of flagstone to choose from, we were ready for the next step.

Laying the Stone


Having never done this before, we were on a high learning curve.

At first it really was like assembling a puzzle. We'd lay out stones on the grass and in the flower beds to view the shapes so that we could find the perfect piece for the space.  

"I'm looking for an obtuse triangle" someone would shout out.  
"Got one! Try this." 

"Alabama... do you see one shaped like Alabama?"
 It really was like a game.


You can imagine using this method took a lot of time and eyes to find the perfect stone for each space.

Ace helper adjusting his tunes

As we began the second half of the patio and there weren't as many stones to choose from, it became harder and harder to find the perfect stone. It was evident that we would have to cut the stones to alter their shape.

We tried the chisel method of scoring the stone, using a hammer and chisel on the scored line to break the stone where it needed to be altered. This worked... sometimes, but was essentially a frustrating experience when the stone broke the wrong way, which happened often. There had to be better way. 

Keep in mind that we could have bought pavers with nice uniform edges that fit together perfectly.  But that was not the look we were going for. We wanted a stone patio that looked not so formal... a little more country.

What to do, what to do...

Fortunately I married a smart man, and what he doesn't know, he figures out. Out comes the circular skill saw and after purchasing a masonry blade, we were in business once again. We now had the ability to make the stone fit the space.  Not wanting perfectly squared edges, he would lightly tap with a hammer after using the saw to make the edges look more natural. 


After the stones were all in place, we needed to make the surface  level from stone to stone. My Honeyman used a 2x4 to spot the areas that needed adjustment and a level to level the surface of the stones, carefully lifting up each stone and raising or lowering the sand as needed. This took a whole lot of time, but it was essential to our desired outcome of near perfection. :)


Up next... Filling in the Gaps.  Stay tuned!


Monday, April 18, 2011

DIY Flagstone Patio... Preparing the Foundation


My Honeyman is the bombdiggity. Whatever I can dream... he can build.  Right now we are in the middle of building a beautiful...  oh, but wait... that's another day's post that you'll just have to wait for.  Today we are sharing Part One of how we built our gorgeous FLAGSTONE PATIO... totally by ourselves. Why pay someone else to do what we can do together as a family? Family Projects give us an opportunity to work together shoulder to shoulder. Together we learn valuable attributes such as patience and respect for each other and staying with a job until it's finally done. And when our project is completed, together we feel the exhilaration of building something beautiful. These are the ties that bind us into a Forever Family.


Here is Part One: Preparing the Foundation
written by (drumroll please)...  My Honeyman:

"As with most of our DIY projects, the planning, preparation and purchasing activities took a good deal of time, but were critical to the beauty of the resulting patio. For those eager to start building your patio, don't be tempted to rush ahead here!

Important considerations we first needed to address:

•    Where to locate the patio? We had already decided this long ago, reserving a space for the patio in our master plan.

•    How large should it be? Smaller would have been easier and less expensive, but we wanted a place to live outdoors and entertain, and so needed some substantial space. We ultimately laid 750 square feet of flagstone, requiring about 4 tons of 2 inch thick flagstone.

•    Shape? We love sweeping curves in our garden, but a square patio may fit your landscape just as well. 

♦   ♦   ♦

With the answers to these questions in hand, it was time to prepare the foundation. This involved creating the proper grade, outlining the shape with bender board, covering the ground with weed barrier, and then leveling it with sand.

•    Preparing the slope of the subsoil is CRUCIAL! It must slope slightly away from the house in order to provide proper drainage. A square-mouth shovel and lots of patience will be required to get it right.

•    We then outlined the space with ½ inch by 4 inch composite bender board, securing it temporarily in place with wooden stakes that were removed as the stones were laid.  (The small rolls of edging from the big box stores will not give you the results you want; check with sprinkler supply stores for the more professional materials.)

•    We next rolled out weed barrier fabric across all the exposed soil. We actually divided the project into sections for this phase of the construction.

•    Finally, we spread a 1 and 1/2 inch layer of masonry sand over the weed barrier. The more level you can get this layer, the easier it will be to level the flagstone later. Tip: we first laid lengths of plastic pipe in parallel every 3 feet or so, then spread the sand between the pipe using a shovel. A length of lumber was then used to scrape or screed the sand. Once the sand was level between pipes, we carefully removed the pipes to continue the process elsewhere. Just ignore the impressions where the pipes were removed—they won’t matter once the stones are placed."

Well said, Dear! Now a few pics and my color commentary:


The morning our sand and stone arrived was a perfect day. I was apprehensive that the bobcat could carry those heavy pallets across my lawn without causing major damage, but it all worked out. Two tons of sand and four tons of stone.


The bobcat did leave his tracks in my Honeyman's well prepared and leveled surface, but that would be a quick fix. With the sand's arrival he was anxious to try his PVC pipe idea to aid in the leveling of the sand, so he got right to it.  It worked like a dream!

*Notice the small concrete pad laid by the contractor when the house was built... their idea of a patio. We just worked over this.


Actually HE works like a dream... still chugging after all these years.


At this point my job was to add color to the grounds to keep his work space gorgeous... keep in mind it was June and I had no intention of letting everything else slide while we installed our Patio.  This was still planting time in our zone 5 gardens and I had lots to do. Each of our eight children and our grandchildren would be home in August and our plan was to have a family picture taken in the gardens... so everything needed to be perfect.


Next post... Laying the Stone. This was challenging and labor intensive, and we all took part in this phase. Think of a giant puzzle to assemble!


Tuesday, April 12, 2011

You've Got to Have A Dream...

Remember the words to the song... 

♪ ♫ You've got to have a dream, if you don't have a dream... how you gonna make a dream come true? ♫ ♪

This is how we have built our beautiful landscape.  

For six years we dreamed of a beautiful Flagstone Patio where we could sit back and enjoy the beautiful landscape we had created. It was an essential piece of our Master Plan. We landscaped all around the spot where it would be, leaving it a blank canvas to be painted when our budget could afford it. We covered it with mulch and referred to it as our Someday Patio.

Ideally this feature would have gone in before the grass and flowers and trees. But sometimes you have to pick and choose your projects according to your budget. So we waited...


And then someday became a reality...


Our Someday Patio... a dream come true!


It was a labor of love working side by side with my dear husband and children. We designed the plan and then worked together to bring our plan to life. And now we enjoy the fruits of our labor!


Yes, I touched everyone of those stones... more than once!


It was like putting together a giant puzzle... stone by stone.


Come join me for the next several posts and we'll share how we created this beautiful patio by ourselves... if we can do this, surely you can too!


Thursday, March 24, 2011

Shhhh... it's a secret.


Mother Nature has a way of teasing us at the change of each season. Beautiful days of sunshine, temps creeping up into the 60's only to be followed by a burst of cold and snow. This is the pattern until Spring finally arrives in full splendor. 

While my gardens are just beginning to wake from their long Winter's slumber, it's the perfect time to prepare the flower beds before summer arrives.

I've learned a great secret in my 30 plus years of gardening.  
STAY AHEAD OF THE WEEDS. 
Seriously. 

It's amazing how fast those weeds grow even when the temperature is so cold.  The perennials and budding leaves need the sunshine to coax them from their sleepy state, but those pesky weeds seem to thrive in extremes of cold or heat.

A friend tells me that their family has mandatory weeding days - "Everyone go out and get 25 weeds out of the yard" - early in the Spring when everything is super wet and they slide out easily.   
  
When I was a child, my Dad paid me a nickle a weed to dig the dandelions from the lawn. Inflation may set the price a bit higher today, but it's a great way to keep your kids and grand-kids involved.
  
Our rule is to NEVER let a weed go to seed on your property, you will be battling that weed's posterity for a million years if you do... so don't!  

Stay ahead of the weeds now before the warmth of the sunshine invites them to multiply and replenish. But shhh...don't tell anyone I said so, because it's a secret.

Guess what I'm doing on Saturday?

    Monday, February 21, 2011

    Where Hummingbirds Gather

    Last summer there wasn't much action going on at my Hummingbird Feeders... but near my grove of Leyland Cypress trees... there was a party going on!


    Who knew that Hummingbirds love Leyland Cypress trees?


     It was such a fun discovery.


    These photo's were all taken on a magical Summers day in August.
    What a delight it was to watch these amazing little birds.
    You can read more about that magical day and why the Hummingbirds are attracted to Leland Cypress by visiting 


    ♦ ♦ ♦

    I must admit, Leyland Cypress was a favorite evergreen of ours long before I discovered the hummingbird's attraction to them. We first fell in love with these beautiful trees when we lived in Oregon. We had just moved to a new state into a new home, that had no landscaping. We knew nothing about plants in this region, so I spent a lot of time visiting nurseries and gardens before we designed the master plan for our landscape. I was on the lookout for new ideas for this new part of the world we had moved to. I soon discovered that just about anything will grow in Oregon so I had lots to choose from. (Oregon surely must be the nursery capitol of the USA, next time you buy a tree or plant, check the tag, most likely it came from Oregon.) We actually saw a row of Leyland Cypress in our neighbor's yard and decided in unison, "We've got to have those trees!" Yes they are that beautiful! So we planted several and absolutely adored them.


    Summer 2010
    When we came back to Utah, we wanted to include many of the features we loved about out Oregon gardens. Leyland Cypress was at the top of our list. We searched everywhere for them. Couldn't find them in nurseries or in landscapes. I finally inquired about them and I was told they wouldn't grow in my zone 5 gardens, especially in our area where the Highland winds can sometimes be intense. That wasn't the answer we wanted to hear. I longed for my Oregon gardens, it was hard to leave them behind. So I kept searching for Leyland Cypress in spite of the advice we had been given. 

    And then I found them... at Home Depot. Doesn't Home Depot sell just about everything for your gardens regardless of what zone you live in? Well this time it was a blessing. I purchased six of them without blinking. Each tree was about five feet tall.  I was willing to take a gamble that they would grow in my new gardens. 

    My Honeyman dug the holes in our hard clay soil and planted them on the property line 5 ft. apart. We wanted them to provide a screen and sound barrier from the neighbor's play area. We installed drip heads at the base of each tree so they would get get regular watering during our hot Summer months. Then we crossed our fingers and waited for them to grow. That was almost eight years ago. 


    Summer 2009
    We have not been disappointed.

    Today they are thriving and stand nearly 30 ft. tall. They are a favorite element of our gardens. We're often stopped by walkers on the paths that run throughout our neighborhood to ask what kind of tree they are. I love to tell them our story. We took a chance and it has paid off.


    Leyland Cypress 
    X Cupressocyparis leylandii 

    The Leyland Cypress is a hybrid between the Alaskan Cypress and the Monterey Cypress that occurred in Wales in 1888. It grows rather quickly (about 2 ft. per year) and has a dense structure, making it ideal for use in privacy screens and windbreaks. It has feathery, soft pointed needles arranged in flat sprays on long thin branches.  And as with most evergreens, its needles release a pleasant fragrance when broken. Leyland Cypress trees thrive in full sun to light shade and tolerate most soil types. They will grow to a height of 60-75 feet tall  with a 10 foot spread. 


    Their lacy needles are delicate and light 
    and so beautiful 
    as the sun softly filters through them.


    And they are absolutely stunning in Winter.

    Besides,  the Hummingbirds adore then as much as we do!

    Can't wait for the party next Summer!

    Another post or two coming soon about Evergreens in our gardens.  Stay tuned!